Knitting my Christmas Tree Sweater
This sweater is a design by Originally Lovely. You can find the pattern online here, or search on Ravely.com.
This is one of my favorite sweaters, and it’s just the right time of year to pull it down from the shelf and start wearing it as much as I can this season. I started knitting this sweater a couple years ago as part of a knit-a-long on Facebook. I went on to knit two more sweaters by Originally Lovely because I really loved the fit of this sweater.
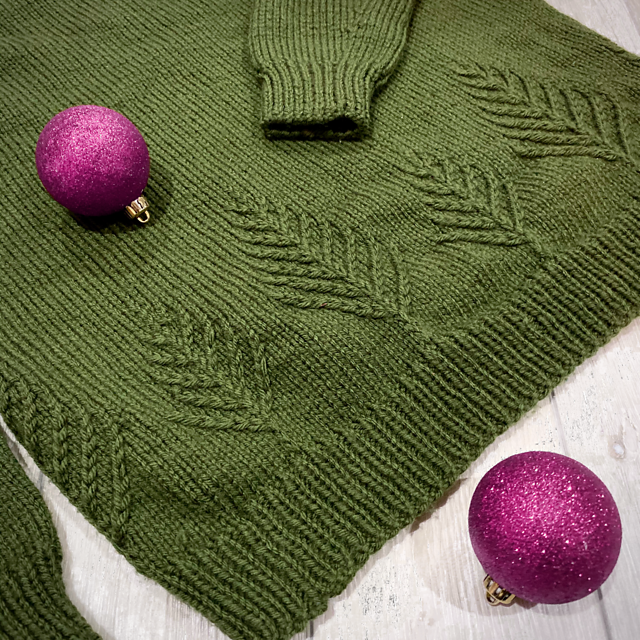
To create this sweater, I used Premier Anti-Pilling Everyday Worsted Solids Yarn in the color Spruce.

What drew me to this sweater in the first place was the interesting tree design motif made with slipped stitches. It looked like a fun project to knit, and it definitely was!
Knitting the trees took some counting and focused attention, but after they are complete, the rest of the sweater is smooth stockinette stitch and sleeves.
After finishing the main body of my sweater, I found that the neckline was fitting me much too high in front. I didn’t want to have to rip out several rows of my sweater and re-knit a lower neckline. So, I used my sewing machine and serger to create a new neckline.
First, I traced out a new curve using tailors chalk. Then, with my sewing machine set to a stitch length of 2.5, I stitched a straight line following the chalk. This stitching will help prevent the sweater from over-stretching and prevent the rest of the stitches from coming unraveled. To finish off the raw edge, I used my overlock machine (serger).

After I had a new neckline shaped up, I measured the circumference and determined how many ribbing stitches I would need. Then, I cast on stitches and knit 1 x 1 ribbing in the round until my collar was about 1.5 inches tall. I used a plain knit-wise bind off on the ribbing and left a long tail for sewing. This bind off edge became the edge that would be sewed onto the rest of the sweater. I pinned the ribbed collar in place, then sewed it on using a darning needle.

This comfortable holiday sweater will be a staple in my seasonal wardrobe for years to come.
If you can follow a basic sweater pattern, this is a really fun make. I would recommend this sweater pattern to knitters of all skill levels.

This is NOT a sponsored post. The product links included are NOT paid promotional links and have only been included for your web browsing convenience.