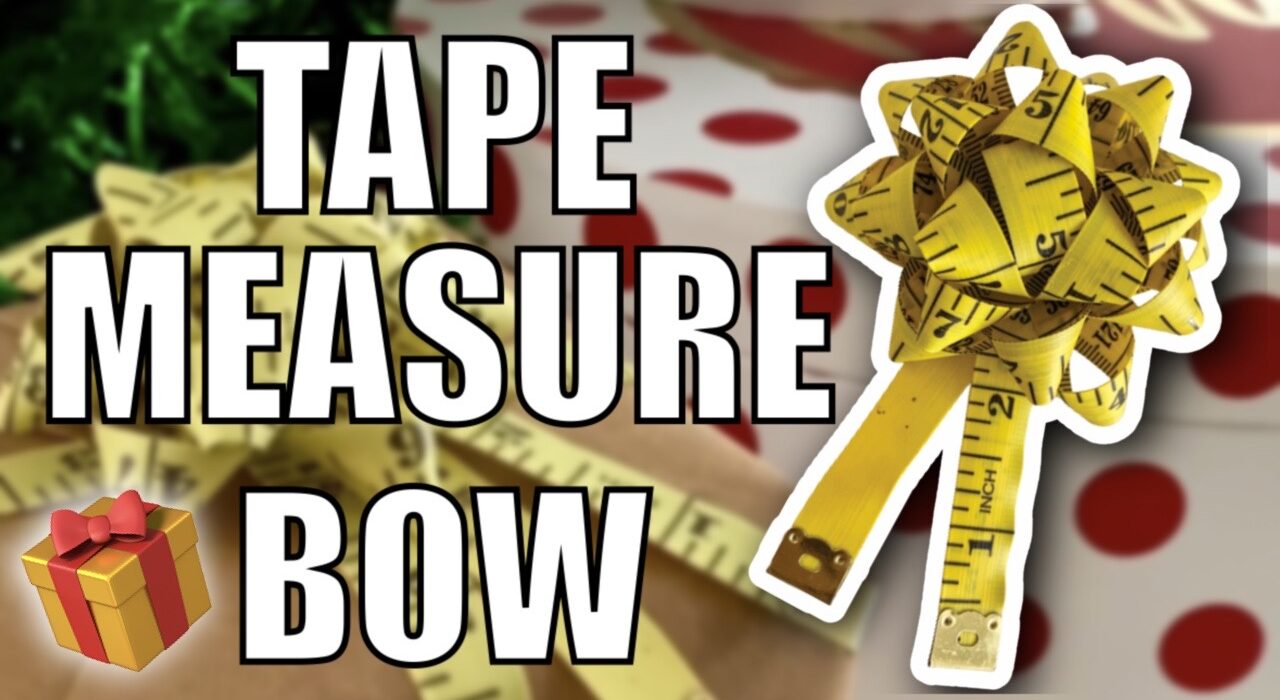
I have a last minute craft tutorial that’s going to make your holiday gift wrapping really stand out. These bows are inspired by the traditional star shaped Christmas bow, but they’re made with tape measures instead. This project is very easy once you learn the technique, and you’ll be able to make several bows in an afternoon.
To see my full video tutorial, click here or scroll to the bottom of this page. Let’s get started!

Disclosure: Some of the links in this post are affiliate links. This means if you click on the link and purchase an item, I will receive an affiliate commission at no extra cost to you. As an Amazon Associate I earn from qualifying purchases. I only recommend products I truly support. All opinions remain my own.
Supplies:
- 60 inch tape measure (I used these ones that come in multiple colors)
- Glue (Quick Hold is my favorite for this project!)
- Optional Pin Backings or Hair Barrettes
- Optional Clips or Clothespins to hold your project in place while working
I used a 60 inch long by half-inch wide tape measure for this project, but if you want to make an even bigger bow, you can select an even longer and wider tape measure. You can use brand new store-bought tape measures or find vintage ones. I recommend using a practice tape measure for your first bow, just to get the hang of the technique. I bought a multi-pack of different color tape measures to make bows for all occasions.

You’re going to need some strong, permanent adhesive for this project. I’ve used E6000 in the past, but because it takes a long time to dry, I recommend using Quick Hold instead. This glue is going to allow you to make the bows more quickly and not have to wait for so much drying time. A small amount of this glue goes a long way. I would not recommend using hot glue for this project because it just doesn’t have the longevity and grip that you need to keep the bow in tact.

Another quick tip I have is to keep your glue standing vertically in a drinking glass or cup to keep it upright. That way your glue is not going to leak out in the middle of working with it.
I also recommend using some kind of clip or clothespin that you can use to clip the bow together while you’re working with it in case you need to set it down and walk away.
Making the Bow:
So now we’re all ready to start making our bows. Go ahead and take off any of the packaging and unwrap your tape measure. You’ll want to decide if you want to have the inches side out or the centimeter side out, depending on what look you’re going for.

The first step is to cut off the first three and a half inches of the tape measure at either end. Glue these two pieces together and then set them aside to attach to the bow later. If you want to, here’s the place where you could use one of those clips to hold these two pieces together while the glue sets up, then you can just set them aside for later.
Now it’s time to pick up the rest of the tape measure and start creating the loops that will form the points of the star of the bow.

All of these loops are going to have the same basic shape and here’s what it looks like up close. You’ll want to add a little glue after you create each one of the loops and let it set in place, especially when you get started, so that your loops are not slipping around while you are forming the foundation of your bow.
As you make each loop going across from one side of the bow to the other, you want to imagine that you’re starting to form a five point star, add a little bit of glue after each loop. You can use one of the clips to hold the loops in place while the glue starts to set up. It only takes a minute or two with this quick glue.

Here you can see that the first couple of loops sort of form a figure eight pattern. The next loop will make a shape that’s sort of like a triangle, and once that comes next loop comes out to the other side, you’ll start to see that the star is already taking shape.

Don’t worry about the middle of the bow right now. We’re going to create a loop for that later for now. Just focus on wrapping and turning each loop and placing a little bit of glue after each loop. Keep creating rows and rows of loops one after the other, a little bit bigger each time, so that the new loop sticks out past the previous row of loops.

As you’re creating each one of the new loops, you want to make sure that it’s a little bit offset from the rows that are on top of it. If you start to feel like the pattern you’re wrapping is becoming lopsided, you can just cut the tape measure and then start making new loops at a different angle. As long as you glue it in place nobody’s ever going to know that this isn’t one big, long, continuous line of a tape measure.

Before you use up all of the length of your tape measure, cut off a small 1.5 to 2 inch section. This section will form the loop for the center of the bow. Create one small ring by wrapping the section around the tip of your finger. Then apply a small bead of glue and use a clip to hold that loop together while the glue dries.

Now finish forming the bow. If you look at the bow and feel like it is looking lopsided or uneven, cut the tape measure and form loops where you feel like there should be more fullness.

Here’s what my bow looked like from the backside after I was done wrapping it all.
After the centerpiece loop has had a chance to dry, do a dry fitting before permanently gluing it to the center of the bow, just to make sure it’s the right size. Once you have determined that the center loop is the correct size, place a little bit of glue in the center and then press the center loop right in place.

Give that last little piece, a little bit of time to set up before you flip your bow over, then I add the tails we made in the first step to the back of the bow. You just need a little bit more glue and leave them kind of hanging down off the bottom at whatever angle you think looks nice.

These bows look really pretty just as they are, but if you want to, you can even go a step further and add something to the back. I like to add a brooch pin backing to the back of my bows, or I’ve even added small little barrettes so that these could be worn in your hair. This is nice way to finish off the bow and make it something that can be used even after it’s done decorating a present. So just add a little bit more glue and add whatever backing element that you want to use.
According to the instructions on the glue, you should let this project sit out for about four to six hours before you pick it up and start using it.

If you make one of these bows for Christmas presents, a birthday gift or any other occasion, please tag me @SincerelySews so I can see your beautiful creations!